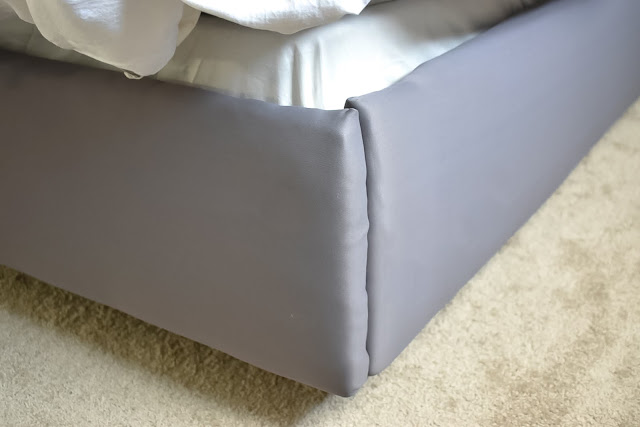
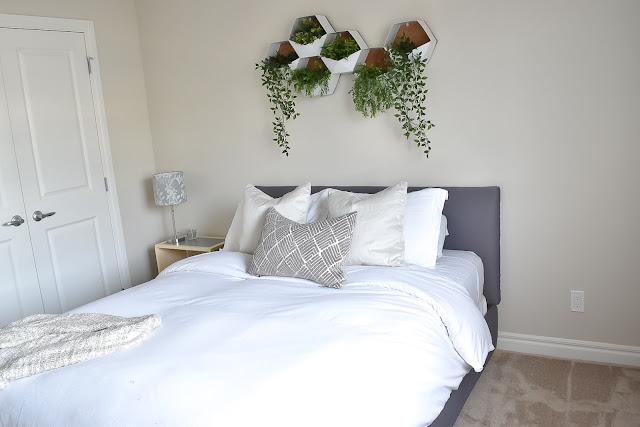
I had wanted to upgrade the bed in our spare room for quite some time. It was just a bare metal frame and I wanted something just a bit more fancy, but I also didn't want to spend a whole lot of money. And then came this idea to build a faux surround for the metal frame to make the bed look like a luxurious upholstered bed but without the hefty price tag.
This project didn't take long, and only cost me around $100. I did have some of the items on hand however so it may be a bit more if you have to buy everything new. This was definitely one of those " Let's see if this actually works like it does in my head" projects and I am thrilled with how it turned out! Keep on reading to see how it all came together!
Materials:
- 1 x 8 pine board
- 1 x 3 pine board
- plywood/OSB
- male end bed rail clips
- corner brackets
- fabric
- batting
Tools
My basic design idea for this was pretty straight forward. I would use pine boards to make a frame of the bed and somehow hook it onto the existing metal bed frame. The hardest part was finding hooks that would work. I settled on bed rail fasteners but just used the male end. I have them listed at the end of post so you can find them easily at your nearest Home Depot or hardware store. Once that was sorted it was just cutting the boards, wraping the batting and fabric, and repeat! Here are the steps below for exactly how I did it.
- drill
- upholstery stapler and staples
- scissors
My basic design idea for this was pretty straight forward. I would use pine boards to make a frame of the bed and somehow hook it onto the existing metal bed frame. The hardest part was finding hooks that would work. I settled on bed rail fasteners but just used the male end. I have them listed at the end of post so you can find them easily at your nearest Home Depot or hardware store. Once that was sorted it was just cutting the boards, wraping the batting and fabric, and repeat! Here are the steps below for exactly how I did it.
Step one:
I measured the three sides of the frame and cut the 1 x 8 boards to size. I kept my mattress on for this as it extended past the metal frame at the bottom. I opted to put the hooks on before the batting and fabric. This was partly because I wouldn't need to possibly fight with placement afterwards and partly because I was impatient and wanted to see if my idea worked. Spoiler: it did :)
Step 3
With the sides attached on the metal frame I took my measurements for the headboard. I wanted my headboard to extend out to these side boards of the new frame so I needed them on before I could measure. After I had that measurement I used a standard height size for a queen bed headboard and cut it to size. I used OSB for my headboard as its what I had on hand, but plywood would work as well.
Step 4
Attaching the batting is pretty straightforward. I tend to make the batting a bit bulkier at the corners to give the corners a more rounded look once the fabric is stapled over top. And speaking of fabric, once the batting is on all the 1 x 8 pieces and headboard its time for fabric! Be sure to pull the fabric nice and taught so it doesn't look ill fitted or baggy.
Step 5
Once everything is wrapped in fabric its assembly time! I attached the side pieces first to the metal frame. Mine fit pretty snug on there but if they are sliding a bit most of the metal frames have holes near the top you could toss a screw though and into the wood to help keep it from sliding up and down. Once the sides where on, the foot board was the next to be attached. I attached it to each side board with two corner brackets. This can be tricky as the fabric and batting are bunched together at the ends so you may just have to push a bit more. These shorter ones are what I had on hand but it's possible some longer brackets could work well if you're really having difficulty due to the fabric bulk at the ends.
And lastly the headboard. I used two 1 x 3 pieces of pine to make the supports for the headboard. To find the length I needed to cut them I rested the headboard on the side pieces and measured from the floor to a few inches from the top of the headboard.
Most of these metal bedframes have holes at the top of them specifically for the headboard supports. I I attached the supports to the metal frame using a bolt, nut, and washer. I first lined up the supports to where I wanted them, then marked where to pre drill holes for the bolts to pass through. Once the supports where attached I screwed the headboard on to them.
And here is the final look!
And that's all there is to it! I am so happy with how this came together as it was actually pretty cheap and it really does look like an upholstered bed frame! I hope that you all enjoyed this tutorial and I would LOVE to see some of your beautiful new bed frames once you make them. You can share them with me over on Instagram by tagging me or share them here with me in the comments. And of course if you have any questions leave them in the comments below and I do my best to respond as quick as I can.
Don't forget to save one of the images below to your Pinterest so you can always find your back to this tutorial!
P.S - Here is the link for the bed rail fastner I used to clip the side boards onto the metal frame.


Thanks for sharing!!! Where did you get the greenery above the bed? I want that too! haha
ReplyDeleteThe plants are from Ikea and Michaels. The holder is from Home Sense, it was one of those lucky finds :)
DeleteSo, with the exception of the headboard, is the “bed” part just a wooden upholstered frame that sits on top of the metal bed frame? I just want to know how removable(and how easily) removable it would be.
ReplyDeleteYour absolutely right. Super easy to remove. I have already taken it off and re upholstered in another fabric. :)
DeleteI used the link to Home Depot for the male bed clips, but what came up are female clips. Have searched internet and cannot find them..... any idea?
ReplyDeleteHi Carol, the photo for some reason is of the female end but the description is still for the male end. You could also give your home depot or hardware store a call or go in with the photo from here and they may be able to help you out!
Deleteso for the bottom board did you have to make it a few inches longer? since the side rails added some length.
ReplyDeleteSo once I had the side boards on I measured the length I would need for the footboard. I went outer edge of one side to out edge of the other.
DeleteWhat type of fabric did you use and how many yards did you buy? Also what thickness of batting did you use?
ReplyDeleteFor the fabric I used curtains! So it would depend on what size of bed you are making. But I believe I bought ones that where 96" long and 52" wide. And the batting was from Michaels.
DeleteWould you happen to have the measurements for the wood pieces and the fabric?
ReplyDeleteThe fabric was from curtains they were 92" long and 52" wide I believe (but I had leftovers) and the wood measurements will change depending on your bed size. I measured with my mattress on the bed frame to get the proper length and then the end piece I measured from the outside edge of each side piece.
ReplyDeleteDid you use a box spring with the mattress?
ReplyDeleteThank you - it’s lovely. I made a headboard years ago and have been planning to re-cover it and do an entire frame, but was stymied by how to attach the sides to the frame. You solved my problem and I do appreciate it!
ReplyDeleteI was searching for best metal bed frame. Thanks, admin for sharing such wonderful content on this topic. Now I have got everything I need about it. Here’s another informative content Best Metal Bed Frame . You may find here more information.
ReplyDeleteBEST idea on the rails!! I couldn't find the male bed rail hooks at The Home Depot were I live. I ended up using picture hooks instead and it's PERFECT! My bed looks like it came from a furniture store! Thanks for the idea!
ReplyDeleteThat's amazing! Glad you found a good alternative. :)
DeleteWhere did you get the curtains? I need that exact color :)
ReplyDeleteIt was HomeSense! They normally have a good variety of colours.
DeleteGreat Idea! Thx.
ReplyDeleteWere did you find the basic metal bed frame?
Love this! Going to try it myself. How tall is your box spring? I have a 11 inch high box spring.o maybe I should use a 12 inch wide board?
ReplyDeleteHow to make money in slot machines? - Worktomakemoney
ReplyDeleteBut in a หารายได้เสริม casino, your main goal is to find the most exciting wins and the most lucrative and they're doing it. How to make money in slot machines?