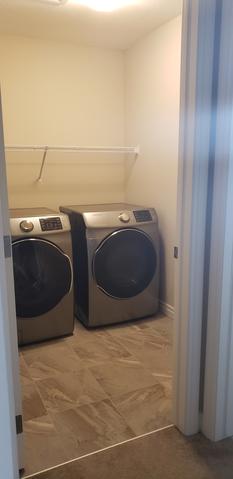
The laundry room in our builder spec house left a lot to be desired. It wasn't functional or nice to look at. It was definitely high on my list of rooms to renovate in our home. I also knew that I didn't want to spend a ton give it a facelift. We had a rainy long weekend and it was the perfect opportunity to tackle the project.
The before
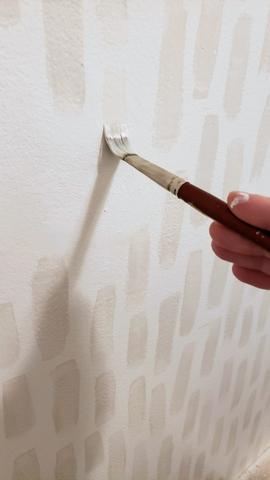
The room is small and has no windows which can only mean one thing- paint it white. I ended up deciding on Whisper White by Behr. It has warmer undertones that go really well with the rest of the house.
I knew I wanted to do an accent wall and was thinking of using wallpaper on the back wall. But with me being the impatient person I am I didn't want to have to wait on the room reno for the wallpaper to arrive. I had seen a few photos on Pinterest and Instagram of people painting a faux wallpaper and thought I would give it a shot. The hardest part about it is deciding what kind of pattern you want to make and which brush to use. I kept it simple and just use a square brush.

I decided to use the left over sample paint I had from the bathroom to help tie the rooms together since they are right beside each other.I tried to make the brush strokes as random of a pattern as possible but only did small sections at once. It's a tedious process but its so worth it! Not having to wait for the wallpaper and saving money by hand painting the wallpaper instead of buy with left over paint was a win for the pocket book!

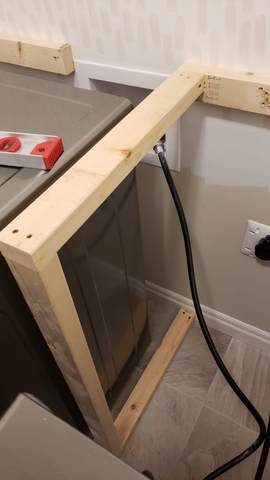
Now that the paint was taken care of it was time to make the room more functional which meant adding a counter top. To install the counter top I first had to make braces for it to sit on. I used 2 x 3 pieces of construction grade lumber ( that was just what I had on hand so again a freebie, although 2 x 3's aren't overly expensive even if you have to buy some ) and attached them to the back wall and side walls. I was extra cautious when drilling the 2 x 3 into the back wall as there is a lot of venting and electric work that is hidden behind the drywall. So be extra sure you are in fact at a stud and not something else.

I cut the side braces so that they only extended 20" from the back wall so that the 25" counter top would hide them. I also painted the ends of the braces the same colour as the wall to help hide them even more.
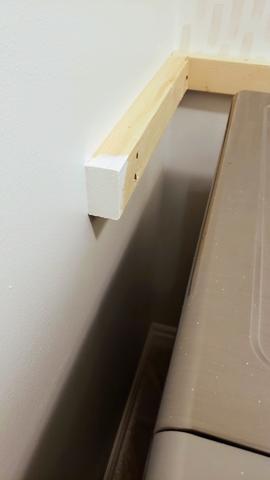
For the middle brace I made C shape. A piece of wood came out from the back brace, another straight down to the floor, and then another back towards the baseboard.
I knew a counter top was definitely going in but I went back and forth on having open shelving vs cabinets storage. With the room being so small I felt open shelving would be the best option as it would allow me to use the vertical space but not close off the wall the way cupboards would. The shelves where also a lot cheaper than cabinets.
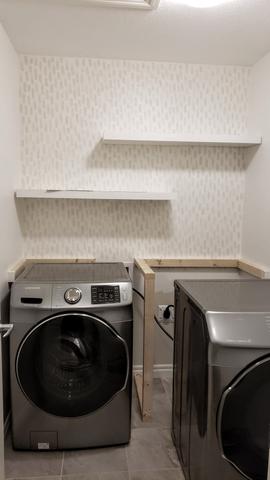
Now that I was done having to reach the back wall I could install the counter top. To attach the counter top I used industrial adhesive. I didn't feel like any screws where needed as the adhesive is extremely strong and the counter top wasn't going to be getting knocked around.

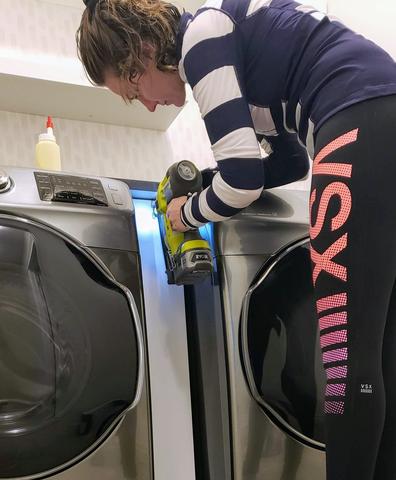
To cover the middle brace I used a 5" wide piece of primed MDF from Home Depot. I attached it with wood glue and brad nails, then I painted it the same as the wall colour.

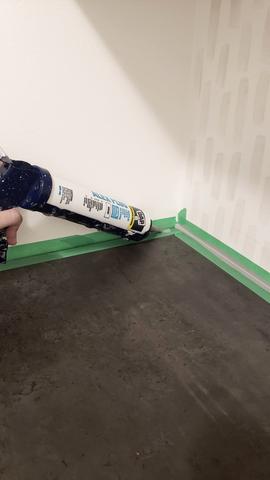
To finish off the counter top I caulked around the seam between it and the wall. I decided to go with gray caulk to match the counter top. Because of this I wanted to be sure I got a clean straight line against the white wall so I used painters tape to cover the wall and counter. Once I applied the caulk I waited maybe 30 seconds and then peeled off the tape.
After that I added some baskets for storage and decor to the shelves and it was a wrap! I have everything I used listed below (some decor items are old so they wont be listed). The laundry room is way more functional now ( not to mention way prettier!) and it didn't break the bank!


Products:


Follow along on Instagram for all of the behind the scenes, and be sure to check out my Pinterest to see where I get all of my inspiration from!
Don't forget to save an image below to Pinterest so you can find your way back to this page!
Don't forget to save an image below to Pinterest so you can find your way back to this page!


This looks gorgeous! Can you share both paint colors used?
ReplyDeleteThank you! The main colour is Whisper White by Behr and the accent is Kitten white by CIL.
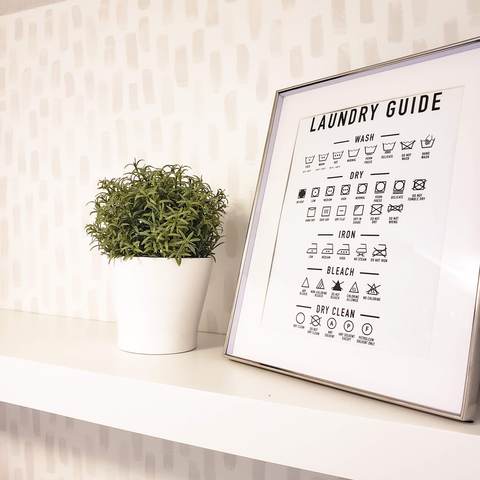
DeleteWhere did you get the laundry directions you framed?
ReplyDeleteHi there! It is from an Etsy store called BePrintable. You can search for it on Etsy or if you click on the photo of it at the bottom of the blog it will take you right to the listing :)
DeleteWhat type of paint brush did you use?
ReplyDeleteIt was just one I had laying around the house. The brush you use will depend on how big you want the accent blocks. You can go as big or as small as your want! :)
DeleteThank you for sharing such information, its very helpful. The Curtain dry cleaning is the most effective way to get rid of accumulated dust, dirt, and allergens. We give the professional cleaning to curtains.
ReplyDeleteHow do you access the shut off valves for the washer? I'm looking to do something similar but want to make sure I can access those (my plumbing is prone to fail).
ReplyDeleteI would suggest pulling the washer out and shutting it off. The valves should be just below the shelf.
ReplyDelete